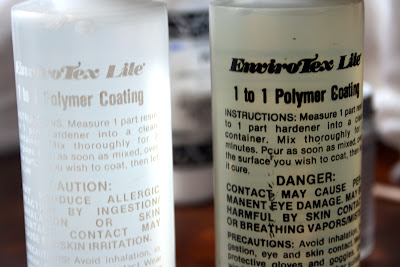
Yes I am unlocking the secrets of resin! I know that resin can be a really intimidating thing but I am going to share a few tips and tricks to make it a little easier. If I can use it anyone can use it.
Supplies:
1. Resin- I use envirotex lite :) with a Micheal's coupon you can get a box for a good price.
2. Popsicle sticks- I got mine from the dollar store.
3. 2 plastic cups- clear
4. a pony tail holder- extremely important
Step 1- Use the pony tail holder if you have long hair to put your hair in a pony tail. This is crucial. The first time I used resin I had it stuck in my hair. :( not cute.
Step 2- Place your 2 plastic cups side by side and fill less than inch or so in each container of the mixture. It is really important that you fill them in equal parts. If you don't it will mess up the whole formula. So super important! Another tip is that you don't want to use too much. If you use too much it can overheat.
Step 3- Combine the mixtures from the cups into one cup and make sure you get all the mixture. Then you take a popsicle stick and mix.. whip the crap out of it. :) You will see bubbles. Do this for a minute or two.
Step 4- pour onto desired surface- now take a popsicle stick and spread the resin like frosting a cake. Less is more- you can always add more resin. Pop any bubbles.
Step 5- let it dry. in a dry... non dust place. If you need it done in a hurry it will be fine after 24 hours but would recommend letting it sit for 48 hours.
I wanted to add the resin to add that candy coated 3d effect to some of my paintings. This painting I am entering in juried show at the Froelick Gallery and the theme is horses. :) Who says there can't be a horse stuck in a subway. Fingers crossed I get in.


14 comments
I have always been intimidated by resin :) You made it look so easy - who knows, I might have to pick up a little the next time I am near a craft store. I like to learn how to do new things. Thanks for the lesson.
Good tips!
oh this is a really neat technique....looks wonderful with your piece!!!
it still looks intimidating!! well, just the bubbles part :)
So you mix a bit from each bottle... how long will a bottle last? Like can you do 3 say 8x8 paintings with the bottles you bought? Just curious.
love the effect of the resin on your works!
Great post! Messin' with resin is something that's been on my want-to-do list for quite sometime (along with a bunch of other things...) I guess I'm just going to have to do it now...
Suzy it goes way further then that. I used the small box and i used maybe 20% for a couple of paintings. :) I love your kitty icon picture :) is that rabbit?
knowing me, I would end up resin-ing my painting to my table, by the end of the drying time there would be a Shih-tzu face stuck in there. My next thought is I'd see the back end of my dog frantically waggling around while stuck face first in my painting that is now stuck to my table.
Thank you so much for sharing this! I have never worked with resin but have been curious. Seemed tricky but less so now.
i like that painting!! good luck :)
OMG I have this same product in a drawer and I've never used it.
p.s. Are you spying on me in my studio?
This is awesome! How did you know I've always wanted to play with resin, but was always too intimidated to try?
I can't wait to work this into a future project ;)
I've always been really intrigued by resin. I didn't know you could get it at michael's- and I work there!
This is fascinating Erika ... I learn so much from visiting your blog. :)
I certainly wouldn't say no to a horse in a subway ... it's a wonderful painting.
I'll keep my fingers and toes crossed for you! :)
How fun! I want to try resin now! Thanks for the tutorial. Love your horse painting!
Post a Comment